

If knitting chart reading is a mystery to you, or if you are just not sure about how to follow charts, read on. They will make your life easier!
Charts are used to provide a visual image of the design in your knitting project, which is especially helpful when the row-by-row written instructions would be very long and cumbersome to follow.
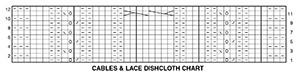
On a chart, each square represents a stitch. The knitting chart includes a stitch key to indicate what stitch the various symbols represent. For example, an empty square indicates that if you are working on the right side (RS), you knit the stitch, if you are working on the wrong side (WS), you purl the stitch. A square with a dash indicates that if you are working on the RS you purl the stitch, but if you are working on the WS you knit the stitch. Notice on the chart below that the three beginning and ending stitches alternate these symbols. This indicates that the stitch is knit both on the RS and WS of the piece.

It is wise to check the stitch key and become familiar with the various symbols used on the knitting chart before beginning the project.
The chart is read from bottom to top, and each row is numbered. For most charts the right side or odd-numbered rows are read across the chart from right to left, and wrong side or even numbered rows are read from left to right. However, before beginning, check the placement of the row numbers on the knitting chart.
For the chart above, written instructions for the pattern are also included on the Cables & Lace Dishcloth pattern, also located on our blog. To check your chart-reading skills, try knitting from the dishcloth chart and see if the row matches our written instructions. The finished washcloth should like like the photo below:
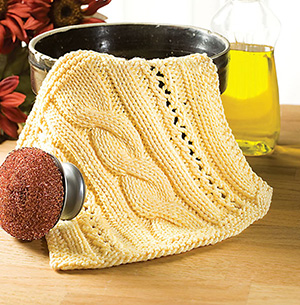
Cables & Lace Knitted Dishcloth
Tips for using knitting charts
- Enlarge a copy of the chart.
- Use a magnetic board for the chart, moving the magnetic strip to mark your place.
- If the pattern is repeated only once, highlight the row once it is completed.
- For a more complicated pattern, list the rows on a separate sheet of paper and check off rows as they are worked.
- On that same sheet make notes and keep track of the last row worked to avoid counting rows when you start your next knitting session.
